Table of Contents
- What is OpenWebRX+?
- Features: What OpenWebRX+ Can Do
- Supported Hardware
- The antenna matters more than the receiver
- Installation: Three Paths to Your Own WebSDR
- 1. Raspberry Pi Image (the easiest way)
- 2. Debian/Ubuntu Packages
- 3. Docker (ideal for existing servers)
- Configuration and Fine-Tuning
- Network Setup: From LAN to the Internet
- Austrian WebSDRs Running OpenWebRX+
- Performance Tips for Stable Operation
- Public or Private? Reporting and Community
- OpenWebRX+ Compared
- Project Idea: Your First WebSDR in One Hour
- Read on at oeradio.at
- Transparency Notice
Imagine sharing your radio receiver with the entire world — directly through a web browser, without anyone needing to install software. That is exactly what OpenWebRX+ enables: an open-source project that turns a Raspberry Pi and an inexpensive SDR receiver into a fully fledged web-based SDR server. Multiple users can simultaneously browse frequencies, watch waterfall displays and decode digital modes — all within a web browser.
What is OpenWebRX+?
OpenWebRX was originally developed by Andras Retzler (HA7ILM) as a university thesis in Hungary and released in 2014. After a period of stagnation, Jakob Ketterl (DD5JFK) took over development and brought the project to a professional level with package management, Docker images and a modern web interface. In 2022, Marat Fayzullin (KC1TXE) started the fork OpenWebRX+, which has since grown rapidly and offers numerous additional features.
OpenWebRX+ positions itself as a "tricorder for the radio spectrum" — a universal tool intended to decode as many communication protocols as possible without having to cobble together different programs. The project was honoured with the Amateur Radio Software Award in 2024.
State of development (August 2026): The fork is actively maintained and version numbers move on almost weekly. The current series is 1.2.x, the ready-made SD card image for the 64-bit Raspberry Pi arrived in June 2026 as 1.2.117, and 1.2.119 followed shortly after with a first P25 decoder. The licence is AGPL-3.0.
Jakob Ketterl's original looks different. Its last regular stable release was a security hotfix in October 2023, and while the repository still sees activity, the release cycle has effectively stopped. Anyone setting up from scratch today therefore takes OpenWebRX+. One thing matters here: the two package repositories do not get along, so you add either one or the other, never both.
Features: What OpenWebRX+ Can Do
The feature list of OpenWebRX+ is impressive and grows with every release. Here are the key highlights:
Digital modes — decoded directly in the browser:
- Amateur radio modes: FT8, FT4, WSPR, JT65, JT9, FST4, FST4W, Q65, CW (Skimmer), RTTY, SITOR-B, JS8Call
- Digital voice: DMR, D-Star, YSF (Yaesu System Fusion), NXDN, M17, FreeDV
- Packet/APRS: APRS decoding with map display and APRS-IS integration
- Image decoding: SSTV (Slow Scan Television) and weather fax (HF FAX)
- Aviation: HFDL, VDL2, ACARS, ADS-B
- Paging and IoT: POCSAG, FLEX, ISM band decoding via rtl_433
- Maritime: AIS (Automatic Identification System)
- Others: RDS (FM radio text), SELCALL (DTMF, EEA, EIA, CCIR), SAM
User interface and operation:
- Multi-user waterfall: Multiple users can listen to different frequencies simultaneously
- Noise reduction: Built-in noise reduction algorithms for improved reception
- Scanner: Automatic scanning across frequency ranges
- Audio recording: Record received audio directly in the browser
- Chat: Integrated user chat between connected users
- Keyboard control: Comprehensive keyboard shortcuts for fast operation
- Map integration: Display decoded stations on an interactive map
Supported Hardware
OpenWebRX+ works with a wide range of SDR receivers — from the budget-friendly RTL-SDR to high-end devices. Here is an overview:
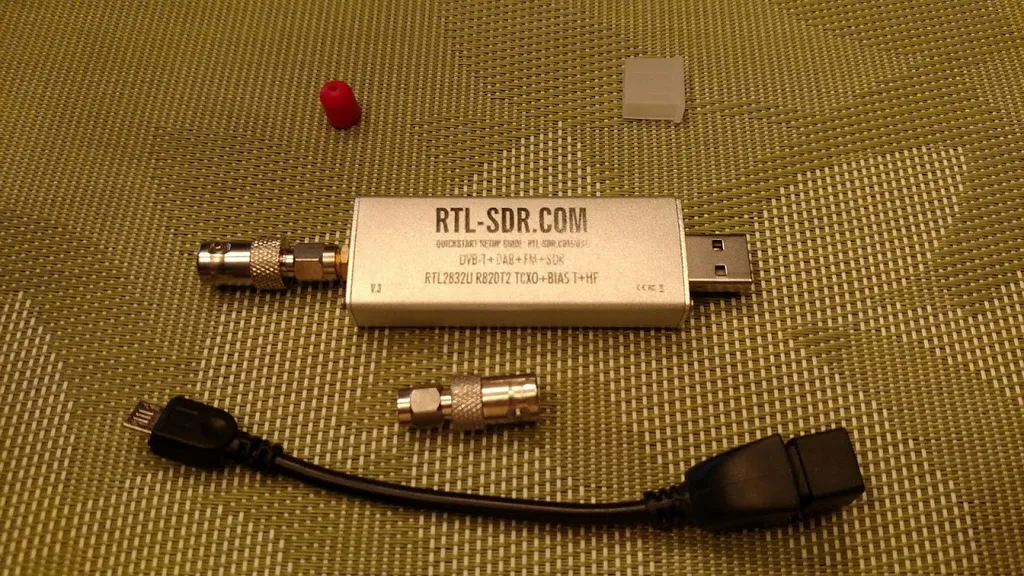
- RTL-SDR (V3/V4): The classic entry-level choice. Frequency range 500 kHz to 1.7 GHz, costs around 30–40 euros. Ideal for VHF, airband, amateur radio bands and ISM
- SDRplay (RSP1A, RSPdx, RSPduo): Wideband receivers covering 1 kHz to 2 GHz with 12-bit ADC and excellent value for money
- Airspy (HF+ Discovery, R2, Mini): Excellent HF receivers with very low noise floor, ideal for shortwave reception
- HackRF One: A transmit-capable SDR (1 MHz to 6 GHz) that can also be used as a receiver
- Hermes Lite 2: Open-source HF transceiver with HPSDR protocol, directly supported
- Web-888: A dedicated WebSDR receiver with built-in FPGA (Zynq7010), covering 1 kHz to 62 MHz plus VHF, with OpenWebRX+ pre-installed
- Others: Perseus, FiFi-SDR, Radioberry, RTLSDR-Airband, PerseusSDR
Tip: For a pure shortwave WebSDR, the Airspy HF+ Discovery is the best choice. For a wideband server covering VLF through UHF, an SDRplay RSPdx or an ensemble of multiple RTL-SDR dongles with different antennas works well. You can find a detailed SDR comparison in our separate article.
The antenna matters more than the receiver
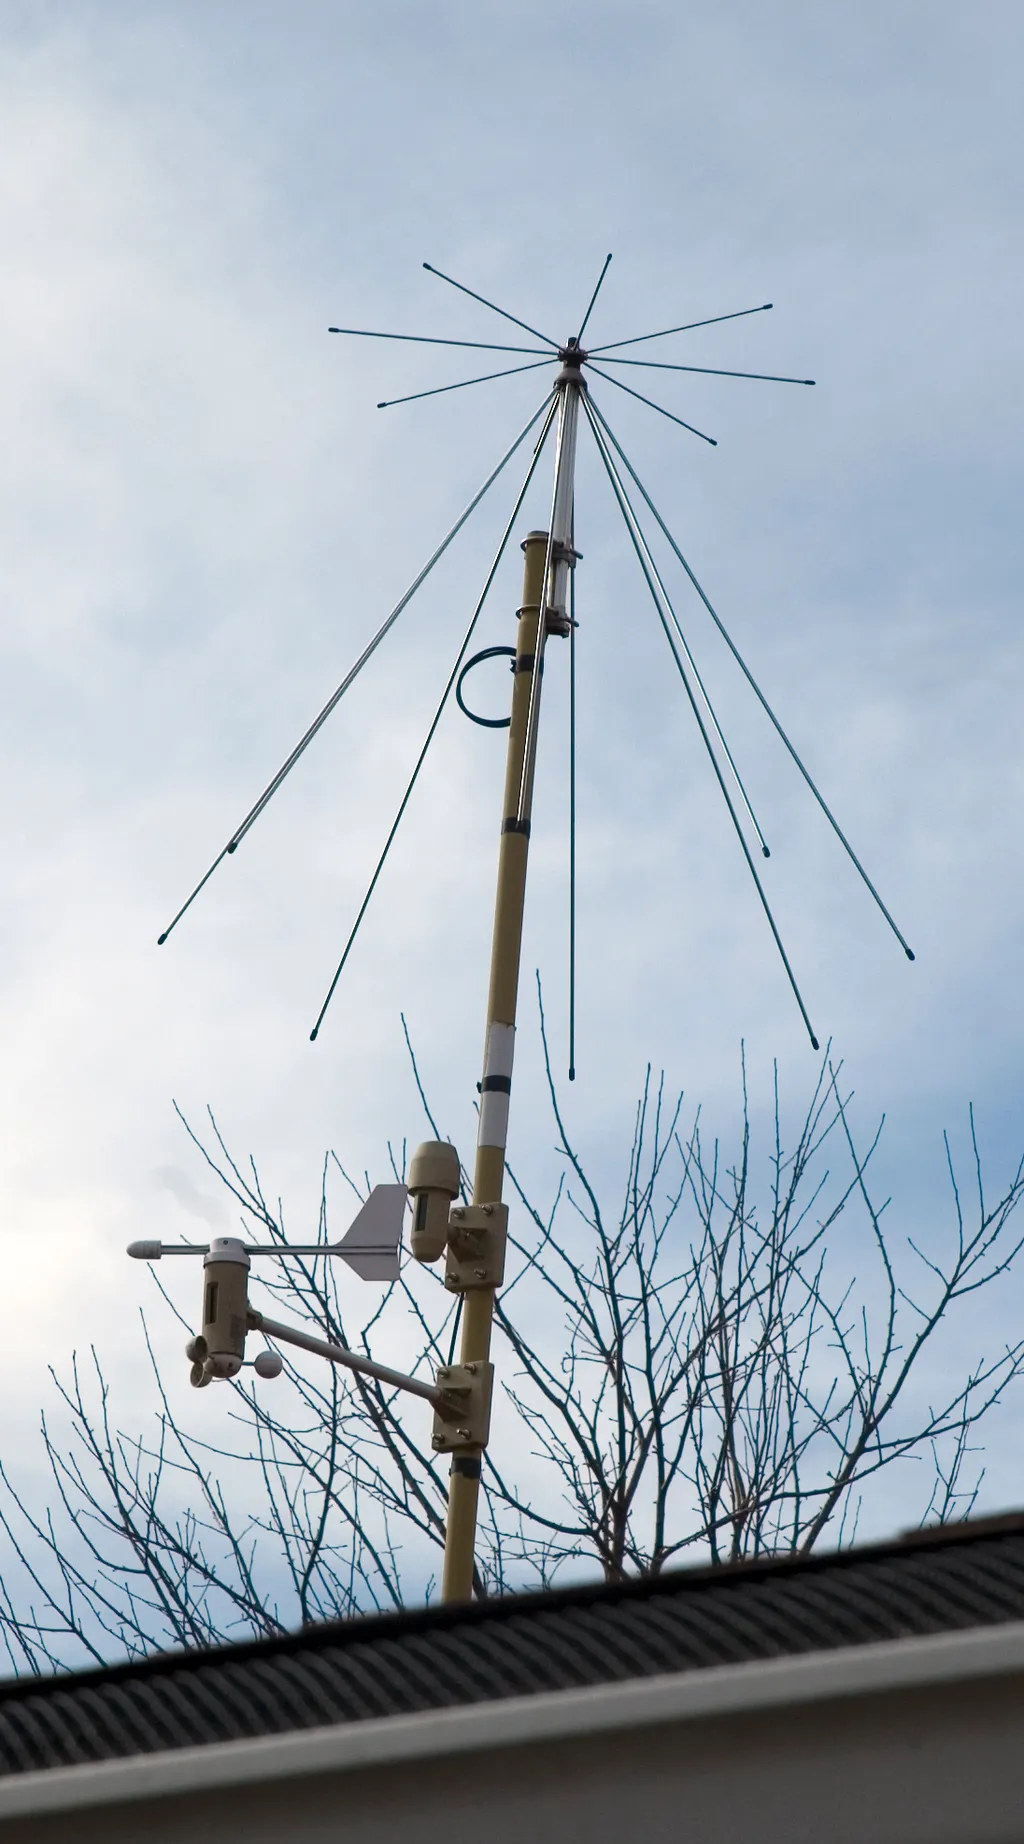
This gets overlooked while tinkering: a 300 euro SDR on a poor antenna loses against a 30 euro stick on a good one. For a wideband WebSDR on VHF and UHF a discone is the obvious choice, because it receives reasonably evenly across several octaves and hears in all directions. For shortwave people usually run a long wire or an active loop, ideally with a common mode choke so the receiver does not end up listening to the house wiring.
And a practical point: once the receiver runs around the clock, you quickly notice how much noise your own house produces. Switching power supplies, LED drivers and chargers are the usual suspects. Before investing in better hardware it pays to spend an hour switching off one circuit after another at the fuse box while watching the waterfall. Whatever is left can partly be tamed with the built-in filters, and how far modern AI-based noise reduction has come is something we looked at separately.
Installation: Three Paths to Your Own WebSDR
OpenWebRX+ offers three installation paths, depending on your experience and intended use:
1. Raspberry Pi Image (the easiest way)
For the quickest start, pre-built SD card images are available. Simply write one to a microSD card, insert it into your Raspberry Pi, connect an SDR dongle — and you are ready to go. Both 32-bit and 64-bit images are available. A Raspberry Pi 4 with at least 4 GB RAM is recommended. RTL-SDR and SDRplay devices work out of the box without additional configuration.
2. Debian/Ubuntu Packages
For existing Linux servers, ready-made packages are available for Debian Bookworm/Trixie and Ubuntu 22.04/24.04 on amd64, arm64 and armhf architectures. Installation uses the official PPA repository:
sudo apt-key adv --keyserver keyserver.ubuntu.com --recv-keys ...
sudo add-apt-repository ppa:luarvique/openwebrxplus
sudo apt update
sudo apt install openwebrx
After installation, the server is available at http://localhost:8073.
3. Docker (ideal for existing servers)
Docker is the most flexible solution, especially when other services are already running on the server. A minimal docker-compose.yml looks like this:
version: "3"
services:
  openwebrx:
    image: luarvique/openwebrx-plus:latest
    ports:
      - "8073:8073"
    devices:
      - "/dev/bus/usb:/dev/bus/usb"
    volumes:
      - "./settings:/var/lib/openwebrx"
      - "./tmp:/tmp/openwebrx"
    restart: unless-stopped
Run docker compose up -d to start the server. USB devices are passed directly to the container, and configuration persists in the local settings folder. Docker images are available for x86-64, ARM64 and ARM32.
Configuration and Fine-Tuning
After installation, all configuration is done through the web interface — no need to edit configuration files (although that remains possible).
SDR Profiles: Under "Settings - SDR Devices and Profiles" you create one or more profiles for each connected receiver. A profile defines the frequency range, sample rate and display parameters. A single RTL-SDR might have three profiles: the 2-metre band, the 70-centimetre band and the airband.
Bookmarks: OpenWebRX+ knows three types of bookmarks. Band plan bookmarks come from the integrated band plan database and show which frequencies are assigned to which services. Server bookmarks are defined by the administrator in bookmarks.json and appear for all users. Client bookmarks can be set by each user individually — they are stored in the browser.
Background decoding: One of the most powerful features. When enabled, OpenWebRX+ decodes all configured digital modes around the clock — even when no user is connected. This allows the server to continuously collect FT8 spots across all bands and forward them to PSKReporter. The scheduler allows you to define which profiles are active at which time of day — with automatic calculation of sunrise and sunset for optimal band selection.
User management: Administrator accounts can be created and managed through the web interface. Public access can also be controlled — from completely open to password-protected.
Network Setup: From LAN to the Internet
OpenWebRX+ listens on port 8073 by default. Several proven methods exist for internet access:
Port forwarding: In the simplest case, port 8073 is forwarded in the router to the server's internal IP address. For HTTPS, a reverse proxy is recommended.
Reverse proxy with Nginx: WebSocket support is essential — without it, the waterfall display will not work:
location / {
    proxy_pass http://127.0.0.1:8073/;
    proxy_http_version 1.1;
    proxy_set_header Upgrade $http_upgrade;
    proxy_set_header Connection "upgrade";
    proxy_set_header Host $host;
    proxy_set_header X-Real-IP $remote_addr;
}
Cloudflare Tunnel: An elegant solution without port forwarding. A cloudflared service connects the local server to Cloudflare, which provides access via a public domain. WebSocket is fully supported. This method is particularly suitable when you do not have a static IP or prefer not to configure your router.
HAMNET: If you have HAMNET access, you can make your WebSDR available through the amateur radio data network — independent of the internet.
Austrian WebSDRs Running OpenWebRX+
Austria has an active WebSDR scene. Here are some examples of running OpenWebRX installations:
- OE3XHU (Hollabrunn): Operated by OE3TEC with multiple RTL-SDR sticks and a Moonraker Skyscan antenna, receiving from 25 MHz to 1,300 MHz plus a longwire for HF. Available at
vhf.oe3xhu.at - OE3XNR (Nebelstein): Located at 1,009 m elevation in the Waldviertel region (JN78jq). Available at
sdr.oe3xnr.xax.at - OE6XUG (TU Graz): Operated at the Graz University of Technology Lustbuehel Observatory (JN77rb, 480 m). Multiple SDR receivers covering different bands
- OE4XLC (Allhau): Classic WebSDR in southern Burgenland, operated by OE4RLC
- OE3XSA (Krems-Egelsee): OpenWebRX+ at 450 m elevation (JN78sk)
A complete and up-to-date list of all WebSDR receivers worldwide can be found on ReceiverBook (receiverbook.de) — the directory maintained by the OpenWebRX community. You can also register your own receiver there.
A continuously maintained overview of Austrian receivers lives on our own directory page WebRX Austria, which is also listed in our tools overview. If you run a receiver that is missing there, a short mail to the editorial team is enough.
Performance Tips for Stable Operation
A WebSDR server ideally runs 24 hours a day. To ensure reliable operation, here are some proven tips:
- Ethernet over WiFi: The continuous data streams from SDR benefit enormously from a stable wired connection. WiFi latency causes dropouts in the waterfall display
- Reduce FFT size: A smaller FFT size (e.g. 4096 instead of 8192) significantly reduces CPU load at the expense of frequency resolution in the waterfall
- tmpfs for /tmp: Move temporary decoder files to a RAM disk to protect the SD card:
tmpfs /tmp tmpfs defaults,size=256M 0 0 - Limit background decoding: Do not activate all modes on all bands simultaneously — even a Raspberry Pi 4 will struggle
- Cooling: A passive heatsink or a quiet fan significantly extends the Raspberry Pi's lifespan during continuous operation
- Powered USB hub: When using multiple SDR dongles, use an active USB hub to avoid voltage drops
Public or Private? Reporting and Community
A WebSDR can be operated purely privately — only for your own remote access. However, most operators choose to make their receiver publicly accessible and thus contribute to the amateur radio community.
ReceiverBook: The directory of the OpenWebRX community. Register your receiver there so that other radio amateurs can find it. Registration is free and displays your location on a world map.
PSKReporter: When background decoding is enabled for FT8/FT4/WSPR, OpenWebRX+ can automatically forward decoded spots to PSKReporter. This way you contribute to global propagation monitoring.
APRS-IS: Decoded APRS packets can be forwarded to the APRS Internet System — turning your server into an iGate.
User limits: Depending on hardware, the number of simultaneous users can be limited to ensure quality for everyone. A Raspberry Pi 4 typically handles 5–10 concurrent listeners.
OpenWebRX+ Compared
OpenWebRX+ is not the only WebSDR platform. Here is a brief comparison with the alternatives:
KiwiSDR: A dedicated hardware solution (approx. 300 USD) with its own BeagleBone board and 14-bit ADC. Receives 0–30 MHz with full bandwidth simultaneously and supports up to 8 concurrent users. Excellent for HF but limited to shortwave and more expensive than an RPi-based solution.
WebSDR (PA3FWM): The original WebSDR software by Pieter-Tjerk de Boer. Supports many simultaneous users but is closed-source and only made available to selected operators.
Web-888: A dedicated WebSDR receiver with built-in FPGA (1 kHz–62 MHz + VHF) that comes with OpenWebRX+ pre-installed. A "plug and play" solution — ideal for anyone who does not want to configure a Raspberry Pi.
OpenWebRX+ has the advantage of being open source, running on inexpensive hardware, covering all frequencies from VLF to UHF and offering the broadest range of digital decoders. Active development by Marat Fayzullin (KC1TXE) and the community ensures regular updates.
Project Idea: Your First WebSDR in One Hour
With the following setup, you can have your own WebSDR running in about one hour:
- Hardware: Raspberry Pi 4 (4 GB), RTL-SDR Blog V4, dipole antenna, power supply, Ethernet cable
- Image: Download the OpenWebRX+ Raspberry Pi image and write it to a microSD card (e.g. with Balena Etcher)
- Boot: Insert the SD card, connect the RTL-SDR, plug in Ethernet and power on
- Access: Open
http://openwebrx:8073or the Pi's IP address in your browser - Configure: Create an admin account, set up an SDR profile, add your first bookmarks
- Enjoy: Watch the waterfall, click on signals, let FT8 decode automatically
For remote access, set up a Cloudflare Tunnel or port forwarding afterwards. And once the server is running stably, register it on ReceiverBook and share it with the world.
OpenWebRX+ turns a modest Raspberry Pi into a powerful radio monitoring station. Whether you want to share your own receiver, collect propagation data or simply listen to your antenna while away from home — this open-source project provides everything you need. Combined with an affordable RTL-SDR, the barrier to entry is low and the possibilities are virtually unlimited.
Read on at oeradio.at
- RTL-SDR for beginners
- Track air traffic live: SDRangel and RTL-SDR as ADS-B receivers
- SSTV and ATV: sending images and video over radio
- DMR for beginners
- Broadband receiver with a Quansheng UV-K5
73 – your oeradio.at editorial team
Transparency Notice
This article was researched and written with the assistance of AI (Claude, Anthropic). The editorial team has reviewed and edited all content. Despite careful review, occasional inaccuracies may occur — we welcome corrections via email to [email protected].