Table of Contents
- What Is DMR?
- Step 1: Register a DMR ID
- Step 2: Radio and Code Plug
- Step 3: The BrandMeister Network
- Important Talkgroups for OE
- Operating Practice
- DMR Hotspots & MMDVM in Detail
- Simplex or Duplex?
- The Hardware: Boards and Form Factors
- The Software: Pi-Star vs. WPSD
- Setup in Five Steps
- Choosing a Frequency & Being a "Good Neighbour"
- Antenna & Isolation
- Multimode & Cross-Mode
- Troubleshooting & Fine-Tuning
- Where to Go from Here
- Transparency Notice
For many operators, DMR (Digital Mobile Radio) is the most convenient way into digital voice: affordable radios, clear audio and — via networked repeaters — the whole world within reach. This article walks you step by step through registration, the code plug, the BrandMeister network and the most important Austrian talkgroups — and dedicates an extensive hands-on section to your own MMDVM hotspot.
What Is DMR?
DMR is a digital voice protocol standardised by ETSI, originally developed for professional land mobile radio. In amateur radio, DMR enables worldwide contacts via networked repeaters and networks such as BrandMeister or TGIF. Speech is digitally encoded (AMBE vocoder) and transported between the repeaters over the internet.
Advantages: clear voice quality right up to the edge of coverage, low power consumption, two parallel time slots (TS1/TS2) on a single frequency, GPS position reporting and text messaging. DMR is just one of several digital voice modes — if you want to compare, we also have articles on D-STAR and Yaesu C4FM/Fusion.
Step 1: Register a DMR ID
Every radio amateur needs their own globally unique DMR ID (7 digits). You can request it free of charge at radioid.net using your own callsign. Austrian IDs begin with the country prefix 232 (e.g. 232xxxx), and the following digit usually corresponds to the callsign district (OE1–OE9). The ID is programmed into your radio and identifies you throughout the entire network.
Step 2: Radio and Code Plug
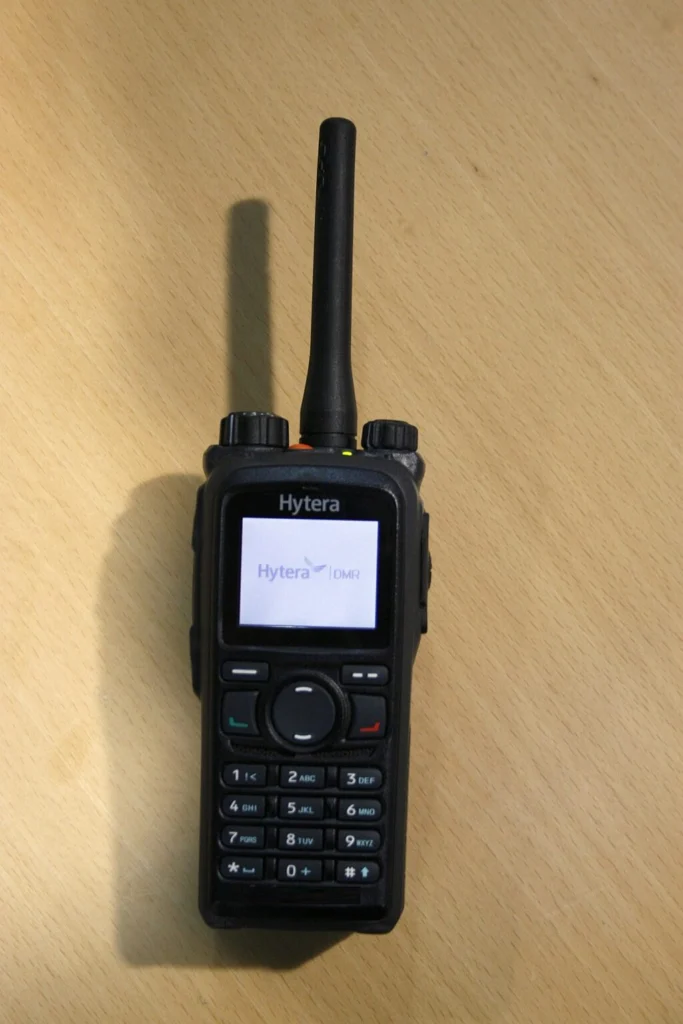
Popular DMR radios:
- Anytone AT-D878UV Plus: approx. €200–250, colour display, GPS, APRS, Bluetooth — the de facto standard among OE beginners.
- Retevis RT3S / TYT MD-UV390: approx. €130–160, dual band, a rugged entry-level radio.
- Motorola/Hytera (ex-commercial): very robust, used from about €100 — programming is a bit more cumbersome.
The code plug is your radio's configuration file: it contains channels, repeaters, time slots and talkgroups as well as the contact list (so the display shows callsigns and names instead of bare IDs). Programming is done with the manufacturer's CPS (Customer Programming Software); the talkgroup and repeater data can be downloaded as CSV from the BrandMeister and DMR databases. Tip: start with a ready-made OE code plug from the community and adapt it — that saves a lot of typing.
Creating a DMR code plug step by step (video: BridgeCom Systems, YouTube).
Step 3: The BrandMeister Network
BrandMeister is the largest DMR network in the world, connecting thousands of repeaters and hotspots. In the SelfCare portal at brandmeister.network you register with your DMR ID and manage your hotspot, static talkgroups and APRS. How the DMR repeaters fit into the Austrian VHF/UHF repeater network is covered in our overview of VHF/UHF repeaters in Austria.
- Last Heard: shows in real time who is transmitting where.
- Hoseline: live monitoring of individual talkgroups in your browser.
- Static vs. dynamic TG: A static talkgroup is permanently assigned to a time slot. A dynamic one is activated by keying it up briefly — it then stays active for a few minutes and drops off again automatically.
Programming BrandMeister talkgroups into your radio (video: BridgeCom Systems, YouTube).
Important Talkgroups for OE
- TG 232: Austria (national)
- TG 2321–2329: OE1–OE9 (regional)
- TG 262: Germany | TG 222: Italy | TG 293: Slovenia
- TG 91: Worldwide | TG 92: Europe
- TG 9990: Parrot/Echo — plays your own transmission back to you (perfect for testing your radio and modulation).
Alpine talkgroups: TG 2328 (OE8 – Carinthia) and TG 2327 (OE7 – Tyrol/Vorarlberg) are well suited for regional and cross-border QSOs in the Alpine region.
Operating Practice
- Press PTT, wait briefly: DMR has a short encoding delay — start speaking only after about half a second, otherwise the beginning gets cut off.
- Give your callsign: e.g. "OE0XYZ mobile on TG 232".
- Leave pauses: a 1–2 second gap after each over, so other stations and the network logic can keep up.
- Mind the time slot: which TG sits on TS1 or TS2 depends on the individual repeater — when in doubt, check the repeater info.
DMR Hotspots & MMDVM in Detail
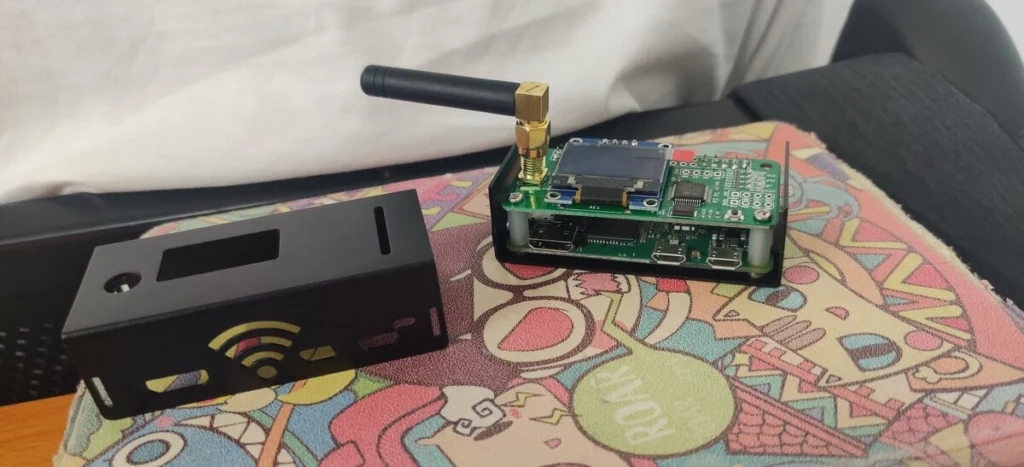
As soon as there is no DMR repeater within range, your own hotspot becomes the key to the digital network. It is essentially a tiny personal repeater: with typically only about 10 milliwatts it bridges the few metres between your handheld and your home internet — and from there the path continues to BrandMeister and thus to the whole world. The heart of it is almost always an MMDVM modem (Multi-Mode Digital Voice Modem), which converts the digital voice packets between RF and the network.
Simplex or Duplex?
The first fundamental decision: simplex hotspots transmit and receive alternately on one frequency and therefore use only a single time slot. They are smaller, cheaper and perfectly adequate for individual use. Duplex hotspots work with separate input and output frequencies and provide both DMR time slots (TS1/TS2) simultaneously — handy if you want to monitor two talkgroups in parallel, but more expensive and more demanding in terms of antenna isolation.
The Hardware: Boards and Form Factors
- MMDVM_HS boards: Most hotspots are based on the open design by DB9MAT and DF2ET. As a HAT, they plug directly onto the GPIO header of a Raspberry Pi. The key component is the on-board TCXO (temperature-compensated crystal oscillator, usually 14.7456 MHz or 12.2880 MHz) — when updating the firmware you must pick the matching variant, otherwise the frequency will be off.
- ZUMspot: a commercially supported MMDVM_HS variant with its own firmware — regarded as particularly well calibrated.
- "Jumbospot" & Chinese clones: inexpensive copies of the MMDVM_HS boards. They usually work, but are not always properly calibrated and do not support the original developers — when buying, check which firmware and which TCXO are fitted.
- openSPOT (SharkRF): a standalone device without a Raspberry Pi, with its own web interface and — from the openSPOT 3 onwards — a built-in transcoder for cross-mode operation (see below). More expensive, but the most convenient plug-and-play route.
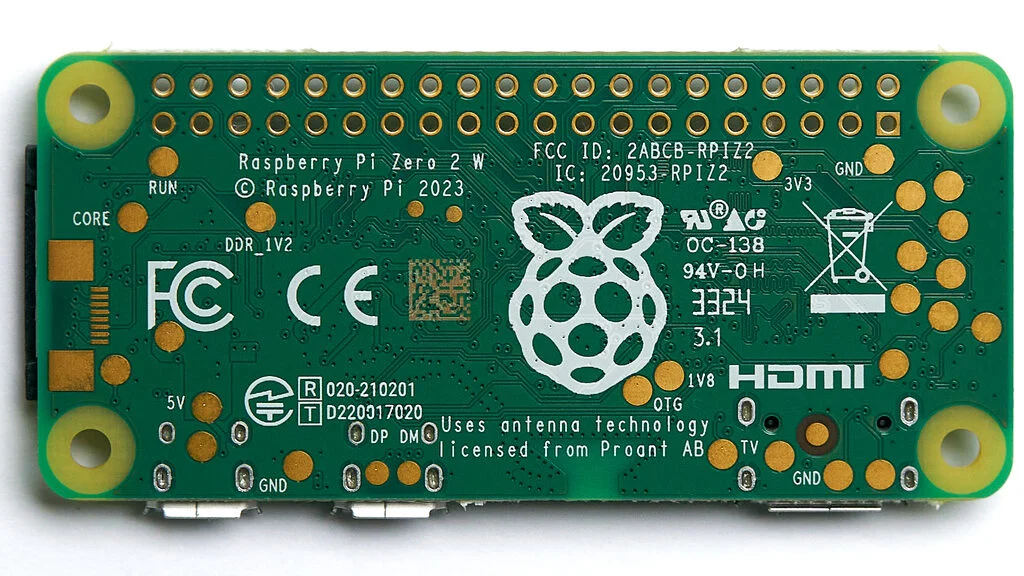
As the carrier platform, a Raspberry Pi Zero 2 W is easily sufficient for pure DMR. If you want to run several modes in parallel or use the more modern WPSD dashboard, a Pi 3 or Pi 4 will run more smoothly.
The Software: Pi-Star vs. WPSD
The actual control software runs on the Pi. Two distributions dominate:
- Pi-Star is the long-standing classic: extremely widespread, excellently documented, frugal and therefore ideal for small or portable hotspots. It supports DMR, D-STAR, YSF, P25 and NXDN. The web interface is functional but showing its age.
- WPSD (by W0CHP) is the more modern successor in spirit: a tidy dashboard with live display, frequent updates, plus M17 and POCSAG. It runs best on a Pi 3/4 and comes with a convenient Wi-Fi configuration generator. For DMR, WPSD uses the DMRGateway, which lets you connect to several DMR networks (BrandMeister, TGIF, FreeDMR, DMR+) at the same time.
Rule of thumb: Pi Zero and "just DMR" → Pi-Star. A beefier Pi, multiple networks/modes and a taste for a modern interface → WPSD.
Setup in Five Steps
- Write the image: flash the Pi-Star or WPSD image onto the microSD card with Raspberry Pi Imager or balenaEtcher.
- Set up Wi-Fi: store your credentials in advance via the configuration generator, and the hotspot will boot straight into your network.
- Open the dashboard: reachable in the browser under the hostname (e.g. pi-star.local or wpsd.local), with configuration done entirely through the web interface.
- Enter your own details: callsign, DMR ID, mode (DMR), network (BrandMeister) and the operating frequency.
- Connect to BrandMeister: set a hotspot security code (password) in SelfCare and enter it in the dashboard — and your connection to the network is done.
Choosing a Frequency & Being a "Good Neighbour"
The hotspot may only transmit milliwatts, but it is a genuine transmission and subject to all the usual rules. A few points are mandatory:
- Prefer 70 cm: the 70 cm band is more common and usually less crowded than 2 m. Choose a free simplex frequency away from repeater inputs and outputs as well as calling and beacon frequencies.
- Respect the band plan: hotspot frequencies are not coordinated — the responsibility not to interfere with anyone lies with you. When in doubt, listen briefly and pick a different QRG if necessary.
- Own range only: a hotspot is intended for personal use at your location, not as a substitute repeater for half the town.
Antenna & Isolation
For simplex operation the supplied stub antenna is plenty — more range is not even desirable. Duplex hotspots transmit and receive simultaneously on two nearby frequencies; here good isolation is crucial, i.e. ideally separate antennas with some distance between them, or a duplexer. Poor isolation shows up immediately as a high bit error rate.
Multimode & Cross-Mode
An MMDVM hotspot can do far more than DMR: depending on the software, D-STAR, YSF (Fusion), P25, NXDN, M17 and POCSAG also run on the same hardware — you simply select the mode in the dashboard. Background on the commercial standards can be found in our article P25 and NXDN for radio amateurs.
Cross-mode operation plays a special role: devices with a built-in transcoder (such as the openSPOT 3) can convert an incoming signal into a different mode — so you can, for example, use a D-STAR radio to talk into a DMR talkgroup. Pure MMDVM hotspots without a transcoder, on the other hand, remain strictly "same mode in, same mode out".
Troubleshooting & Fine-Tuning
- Parrot (TG 9990) first: key up the echo talkgroup and the network plays your own transmission back — the quickest test of whether radio, hotspot and connection are working together properly.
- Keep an eye on the BER: the dashboard shows the bit error rate. Values well below 1% are good; higher values point to a wrong frequency, poor TCXO calibration or insufficient antenna isolation.
- RX/TX offset: some (especially cheap) boards need a small frequency correction value for reception to lock in cleanly.
- Keep the firmware up to date: update the MMDVM firmware and Pi-Star/WPSD regularly — this fixes bugs and adds new modes.
Where to Go from Here
If this has whetted your appetite, digital amateur radio offers plenty more to explore: professional trunked radio as a hobby (TETRA on the BrandMeister network), the commercial narrowband modes (P25 and NXDN), the text-based LoRa mesh (MeshCom vs. Meshtastic) and — if you already have a Raspberry Pi running anyway — your own web SDR receiver with OpenWebRX+.
73 – your oeradio.at editorial team
Transparency Notice
This article was researched and written with AI assistance (Claude, Anthropic). Content reviewed by oeradio.at.