
The most important thing first: ESP-SDR is a receiver, not a transmitter, and it works in the range of roughly 1.85 to 2.95 GHz (depending on the chip, best around 2.4 GHz) and, on the ESP32-C5, additionally around 5 GHz, not on shortwave. The open-source project turns the Wi-Fi and Bluetooth radio of an ordinary ESP32 board into a software-defined radio receiver. You need no extra SDR hardware for it, just the board, a USB cable and a browser. Here is how it works, how to try it step by step and what you can expect from it.
What is behind it
The project comes from the ESPARGOS team. By their own account, they found an undocumented debug block in the ESP32 chips that Espressif uses for radio testing in the factory. Normally the received data goes straight into the hard-wired Wi-Fi modem. Through the debug path, the CPU can instead read the raw baseband samples (I/Q). The team writes that they found the mechanism with the help of AI models and that parts of the firmware are AI-generated. On the ESP32-C61 they say they understand the process well, and for the other chips of the family it was carried over.
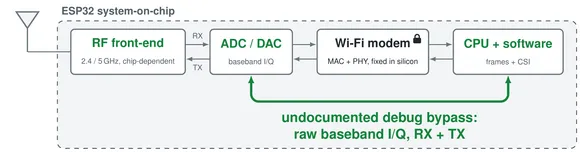
The steps in the firmware are, simplified, always the same:
- The radio is started as for Wi-Fi (as for Bluetooth on the ESP32-H2) and set to the desired frequency, and the transmitter is switched off.
- A memory region is reserved for the recording so that nothing else writes into it.
- The debug block copies a series of samples into this memory. At 80 million samples per second, a recording of around 16,000 values takes about 0.2 milliseconds.
- The CPU reads out the values and sends them over USB or UART to the computer, either raw or as finished computed spectra.
If you want the details, the project has a thorough description, register by register. Espressif does not document any of this. How stable it stays across future chip revisions is therefore an open question.
What it can do
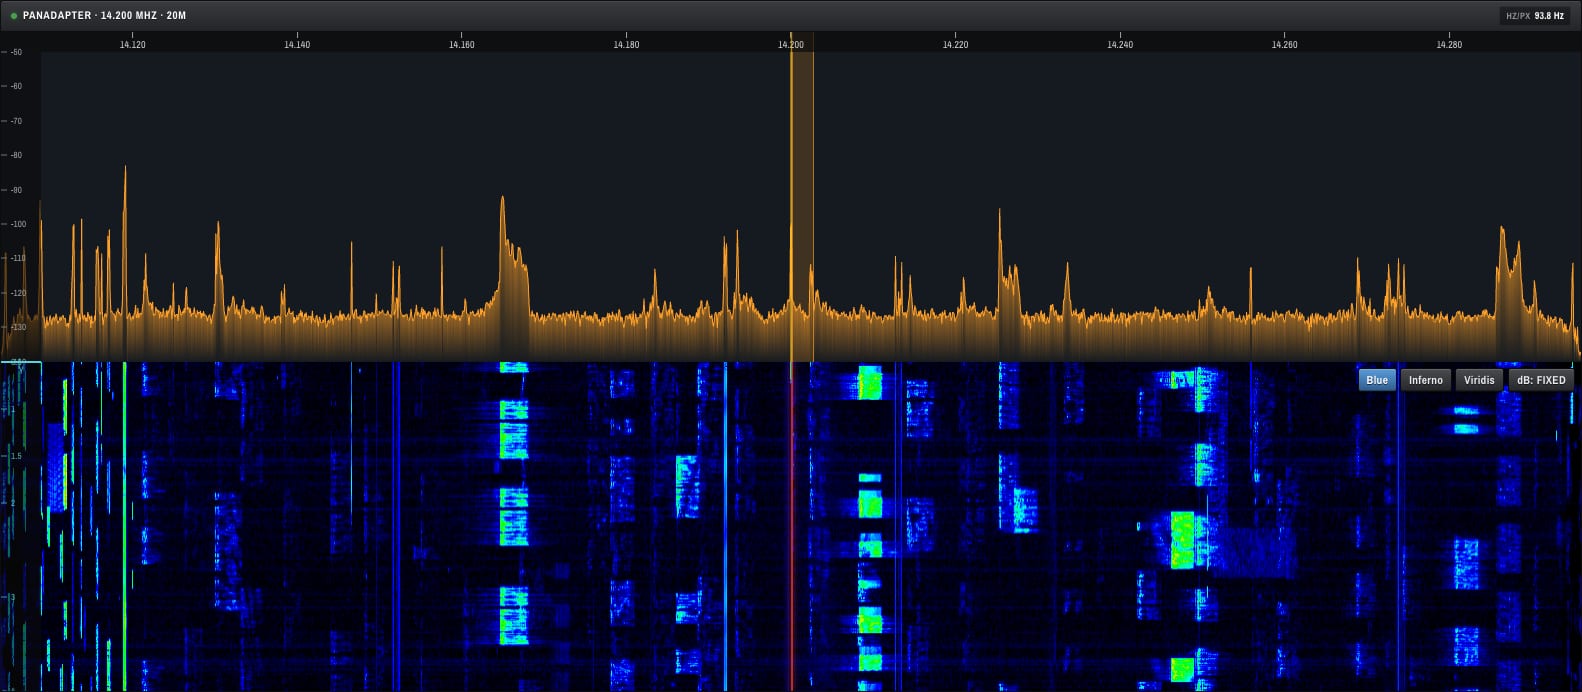
- Spectrum and waterfall in the browser, with adjustable center frequency, gain and bandwidth.
- Sample rates up to 80 MS/s depending on the chip, with analog bandwidths of about 11 to 69 MHz, depending on the chip.
- Frequency range: The firmware accepts tuning requests from 100 to 6000 MHz, but that does not mean anything arrives there. The project measured it with a signal generator (one board per chip, October 2026): the ESP32-C2 received from 1850 to 2950 MHz, ESP32, C3, S2 and S3 from 1850 to about 2750 MHz, the C6 from 1950 to 2850 MHz, C61 and S31 from about 2200 to 2850 MHz, and the H2 only around 2.3 to 2.65 GHz. The C5 received 2200 to 2650 MHz and 5180 to 5800 MHz. Below about 1.8 GHz and at 3050 MHz nothing arrived. All chips work best in the range around 2.4 GHz.
- Spectra in the chip: The firmware computes FFTs with 256 to 2048 frequency bins and sends only the result. This saves data rate.
- Gapless capture ("Continuous capture") on the ESP32-C6, C61, S3 and S31 over native USB, where only part of the signal goes into a spectrum.
- Continuous I/Q stream on the ESP32-S3 at 15.6 to 250 kS/s over USB, and on the ESP32-S31 (experimental firmware) at up to 20 MS/s over USB or 40 MS/s over Gigabit Ethernet. This lets you feed SDR programs such as Gqrx and GNU Radio.
What it cannot do
- It cannot transmit. ESP-SDR is receive-only firmware.
- It does not do shortwave, VHF FM, 70 cm or 23 cm. According to the project's measurements, nothing arrives below about 1.8 GHz. The usable range is roughly 1.85 to 2.95 GHz, depending on the chip, and around 5 GHz on the C5.
- No continuous capture on most chips. Mostly you get short snapshots of up to around 16,000 samples, with gaps in between. That is usable as a spectrum analyzer, but not for decoding a signal.
- No calibrated measurement. The gain is not calibrated in dB, and the level values are relative.
- Susceptibility to strong signals. The automatic gain control is built for Wi-Fi packets and does not protect the input from a strong continuous signal. In that case you should set the gain by hand.
A reader reports in the comments of an RTL-SDR.com article that in one setup (eSpDR, ESP32-S3 without FPGA) the crystal harmonics produce spurs at 2400.000 and 2440.000 MHz. This was tested on only one board and is not part of the project documentation. If you measure right there, keep it in mind.
Which board?
According to the project, many chips of the ESP32 family work. To get started, boards with native USB are a good choice, because only these ports support the faster modes and Android:
- ESP32-S3: spectra, gapless capture and a continuous I/Q stream over USB. A good choice for experimenting.
- ESP32-C6 and C61: gapless capture with 256 frequency bins.
- ESP32-C5: the only one that also works around 5 GHz.
- ESP32-S31: a chip in preview status, currently the only one for streaming over Ethernet and SoapyESPSDR.
- ESP32, C2 and others: work with a UART bridge, but with limitations, and not on an Android phone.
The ESP32-P4 has no radio module and is ruled out. The project does not name prices. CNX-Software writes that the boards could cost less than 5 US dollars.
Step by step
1. Get a board and a cable. An ESP32 board from the list above, preferably with native USB. The cable must carry data, a charge-only cable is not enough.
2. Check your browser. You need a browser with WebSerial or WebUSB: Chrome or Edge on the desktop, Firefox from version 151, and Chrome on Android. Both interfaces only work over HTTPS or localhost, and the project pages meet that.
3. Set up Linux. On Linux, your own user must be allowed to access the serial port, for example by being added to the group dialout (on Arch uucp) and logging in again. ModemManager can probe and reset Espressif devices. If the board restarts unexpectedly, it helps to stop ModemManager.
4. Flash the firmware. Connect the board over USB, close other serial programs and open the firmware installer in the browser. If the board does not enter the bootloader, hold BOOT, tap RESET and release BOOT.
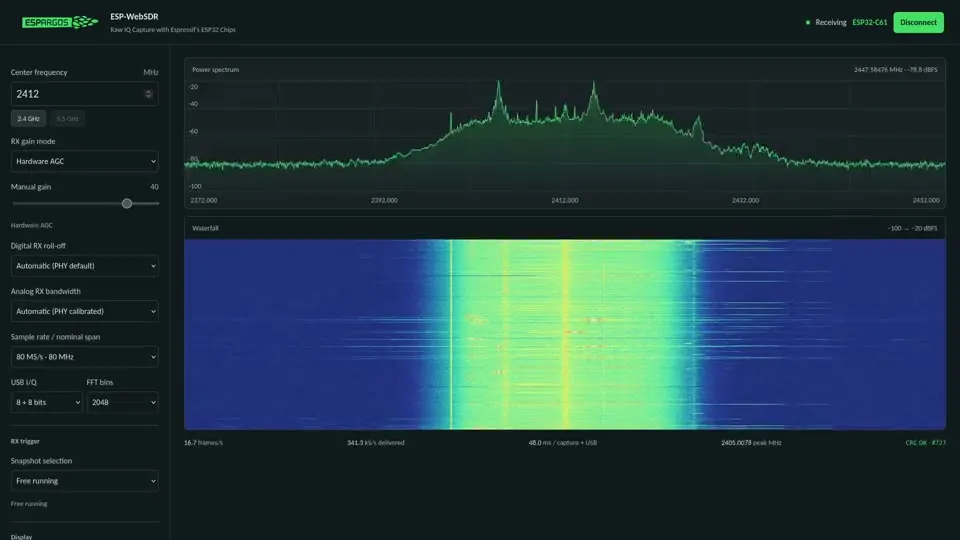
5. Start the viewer. Open the browser viewer, click "Connect ESP-SDR" and select the port. Reception starts right away. Center frequency, gain mode, bandwidth and sample rate can be set on the left edge. With strong signals, switch to manual gain.
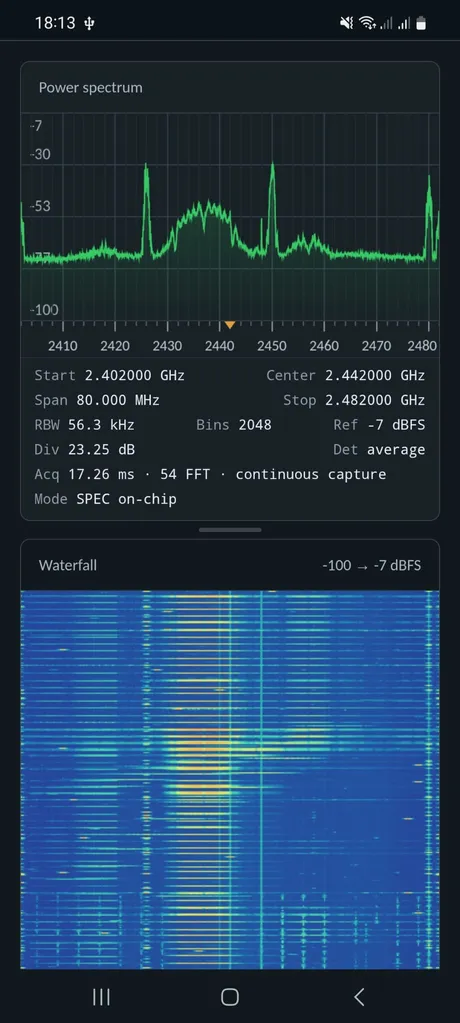
For Android, the board's native USB port must go to the phone, with an OTG adapter if necessary. USB-UART bridges such as CP210x, CH340 or FT232 do not work there.
If it does not work
- Board keeps restarting: The radio section draws current spikes at startup. If the board is powered from the 3.3 volt pin of a USB-UART adapter, the voltage can collapse. A proper power supply helps.
- Transmission errors on the UART bridge: Some bridges, often with a CH340, cannot handle 2 Mbaud. The viewer has "Switch to 1 Mbaud" for this.
- "The device has been lost": A previous program left the port in a state that Chrome interprets as a disconnect. Reset the port or briefly unplug the board.
- Board is not shown (Windows, macOS): A UART bridge may need a driver from the manufacturer.
Where to go from here
If you want more than spectrum and waterfall, there are several ways:
- Gqrx and GNU Radio: with an ESP32-S31 and SoapyESPSDR over Ethernet or USB.
- SDR++: with an ESP32-S3 and the bridge esp-sdr-bridge, or with a dedicated source module for SDR++ from Z2Labs, which receives real I/Q data over USB.
- Your own programs: The firmware speaks a simple line-based protocol over USB or UART at 2 Mbaud (commands such as
INFOorFREQ 2442), and the description is in the project. - Build it yourself: The firmware can be built from source with ESP-IDF, and the exact versions are listed in the project.
And for radio amateurs?
Honestly, ESP-SDR is no replacement for a shortwave SDR. It gets interesting in the 2.4 GHz range, which is where the 13 cm band lies. If you are interested in microwaves (see our introduction to the microwave bands), you get a look at the band for a few euros: who occupies it, where a Wi-Fi network interferes, is my own signal there at all. The RTL-SDR.com report also mentions direction finding, since ESPARGOS is actually an antenna array for direction finding, and a 5.8 GHz FPV video receiver (C5VRX, still in progress).
You should be careful with transmitting experiments. ESP-SDR itself does not transmit. Other projects, for example esp32-sdr-trx, build an experimental FM and SSB transmitter for the 13 cm range on top of it, see the report at RTL-SDR.com. If you want to transmit, you need an amateur radio license and must observe band, power and mode of emission. In addition, the ESP-SDR project writes that the radio can itself transmit briefly at startup and during background calibration. So the firmware is not completely radio-silent. For an overview of the rules, see our article on amateur radio legislation in Austria.
My conclusion
For a few euros, ESP-SDR is a surprisingly easy way into the 2.4 GHz band, and the browser viewer makes getting started a matter of minutes. It does not replace a proper SDR, but it shows how much is inside a chip that you already have in many tinkering projects. The project is young (the repository was created at the end of September 2026) and changes quickly. If you try it, your best bet is to look at the ESPARGOS project page and the GitHub repository.
Best regards, Ferdl
Transparency note
I wrote and checked this article with the support of AI (Claude, Anthropic) based on the public project documentation of ESP-SDR and ESP-WebSDR as well as the reports from CNX-Software and RTL-SDR.com. The steps follow the documentation, we have not built them ourselves. The information corresponds to the status of 18 November 2026 and may change. The three pictures come from the ESP-SDR and ESP-WebSDR projects (GPL-3.0-or-later) and do not show our own station. Legal notes do not replace advice from the competent authority. Corrections and additions are welcome at [email protected].