The Raspberry Pi has become an indispensable tool in the amateur radio shack in recent years. Whether as a digital modem controller, APRS iGate, Winlink gateway or fully-fledged WebSDR receiver — the small single-board computer handles tasks that previously required expensive specialized hardware. In this comprehensive guide, we present the most useful amateur radio applications for the Raspberry Pi and show step by step how to set them up.
The Right Hardware: Which Raspberry Pi for Which Purpose?
Not every Raspberry Pi is equally well suited for every amateur radio application. The choice of the right model depends on the planned use cases.
Raspberry Pi 5 (8 GB RAM)
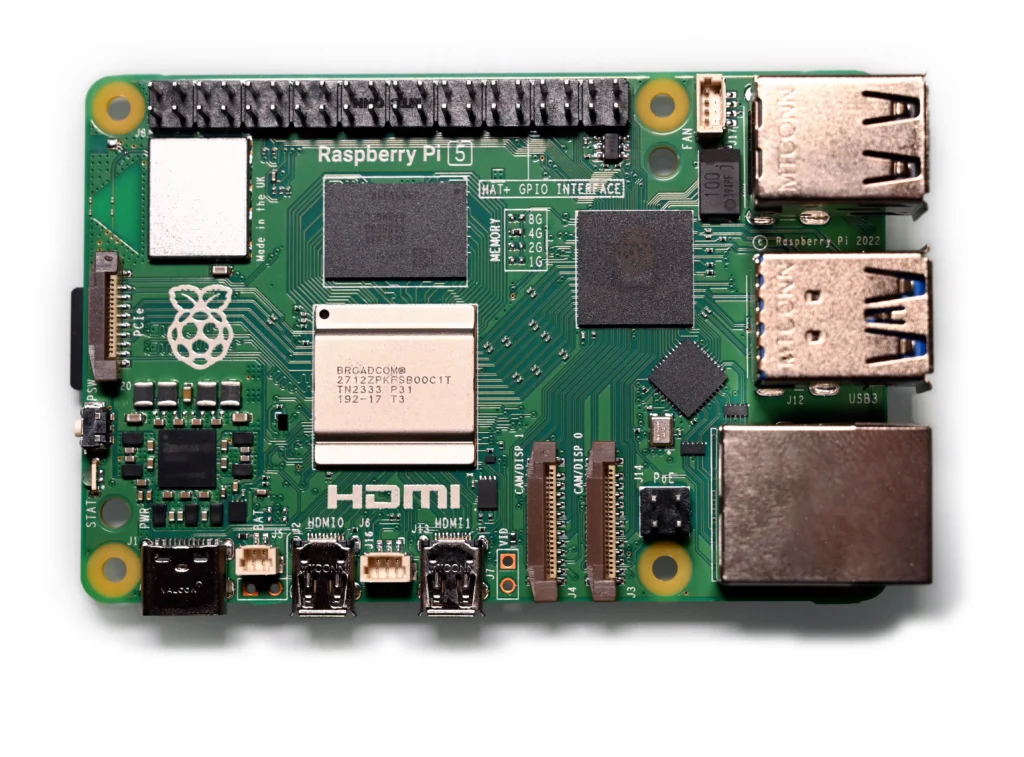
The Raspberry Pi 5 with 8 GB RAM is the current flagship and the best choice for demanding applications. With its quad-core Arm Cortex-A76 processor at 2.4 GHz, it provides enough computing power for WSJT-X, Fldigi and OpenWebRX+ simultaneously. The improved PCIe bus enables faster USB transfers, which is beneficial for sound card interfaces. Especially for multi-application setups where several programs need to run in parallel, the Pi 5 is the first choice.
Raspberry Pi 4 (4 or 8 GB RAM)
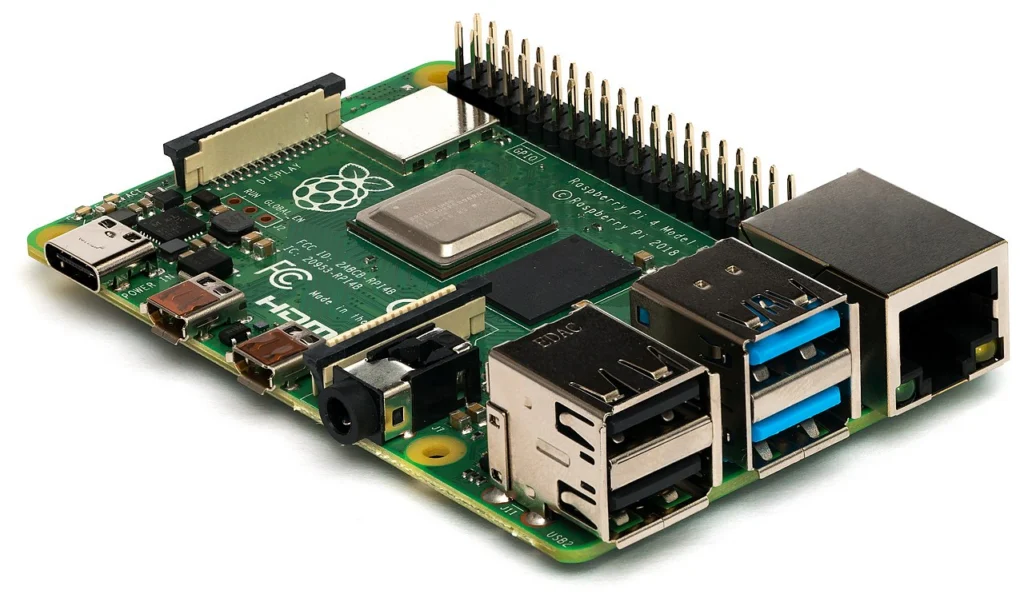
The Raspberry Pi 4 remains an excellent and more affordable alternative. With 4 GB RAM, it is perfectly adequate for most single applications. It is proven, well-documented and supported by all amateur radio software. For dedicated tasks such as a pure APRS iGate or a Winlink gateway, the Pi 4 is more than sufficient.
Raspberry Pi Zero 2 W
The Pi Zero 2 W is the most compact and power-efficient option. With its quad-core processor at 1 GHz and 512 MB RAM, it is ideal for dedicated, resource-saving tasks: a pure APRS digipeater with Direwolf, a simple iGate or a packet radio node. The low power consumption of about 1-2 watts makes it perfect for solar-powered stations or portable operations.
Operating System: Raspberry Pi OS Lite 64-Bit
For amateur radio applications, we recommend Raspberry Pi OS Lite in the 64-bit version. The Lite variant comes without a desktop environment and thus saves valuable system resources. The 64-bit architecture enables access to more than 4 GB RAM and offers a performance advantage in many applications.
Installation is easiest with the Raspberry Pi Imager. During setup, you can directly configure WiFi credentials, SSH access and the hostname. After the first boot, a complete update is recommended:
sudo apt update && sudo apt full-upgrade -y
sudo reboot
For applications with a graphical interface like WSJT-X or Fldigi, additionally install a lightweight desktop:
sudo apt install -y xserver-xorg xinit lxde-core lightdmWSJT-X: FT8 and FT4 on the Raspberry Pi
WSJT-X is arguably the most popular amateur radio software of all. The application developed by Joe Taylor (K1JT) enables digital modes such as FT8, FT4, JT65, JT9 and WSPR. WSJT-X runs surprisingly well on the Raspberry Pi.
Installation can be done directly from the repositories or as a more current version downloaded from the official website. Pre-built Debian packages are available for the ARM64 architecture:
sudo apt install -y wsjtxWSJT-X requires a sound card as an interface to the transceiver. Proven solutions are the Digirig Mobile, the SignaLink USB or also homebrew interfaces. Configuration is done through the audio setup in WSJT-X, where you select the USB sound card as input and output device. CAT control of the transceiver is done via a serial USB adapter or — with modern radios — directly via the built-in USB interface.
On the Pi 5, WSJT-X decodes FT8 signals in real time without noticeable delay. The Pi 4 also handles this without problems, but on the Pi Zero 2 W things get tight — here you should avoid the heavier modes like JT65.
Video Tip
KM4ACK demonstrates Hamlib setup for transceiver control on the Raspberry Pi:
KM4ACK: Hamlib Installation on Raspberry Pi
Fldigi: The Swiss Army Knife of Digital Modes
Fldigi (Fast Light Digital Modem Application) supports an impressive number of digital modes: PSK31, PSK63, RTTY, CW, Olivia, MFSK, Thor, DominoEX, Contestia and many more. It is the most versatile digimode program for Linux and runs excellently on the Raspberry Pi.
sudo apt install -y fldigiFldigi offers an integrated waterfall, macro buttons for standard texts, a logbook and the ability to perform CAT control. Especially for PSK31 and RTTY, Fldigi remains the reference software. Audio interface configuration is done analogously to WSJT-X through the settings. Fldigi also supports Hamlib for transceiver control, allowing virtually all common radios to be addressed.
A particular advantage of Fldigi on the Raspberry Pi is the ability to run it as a headless decoder in the background and call up the interface on demand via VNC or X forwarding.
Direwolf: The Software TNC for APRS and Packet Radio
Direwolf is a software TNC (Terminal Node Controller) that completely replicates the functions of a hardware TNC in software. It decodes and encodes AX.25 packets via the sound card and is thus the foundation for APRS and packet radio applications on the Raspberry Pi.
sudo apt install -y direwolfDirewolf excels through outstanding decoding performance — in tests it often decodes more packets than commercial hardware TNCs. It supports 1200 baud (AFSK) and 9600 baud (FSK), multiple simultaneous channels, KISS interface for connection to other programs and an AGW-PE compatible network interface.
For a simple APRS receiver, a cheap USB sound card adapter and a receiver on 144.800 MHz are sufficient. The configuration file direwolf.conf defines callsign, audio device, modem parameters and the connection to APRS-IS.
Video Tip
Setting up Direwolf as a software TNC — step by step:
KM4ACK: Direwolf Sound Modem on Raspberry Pi
APRS iGate: The Internet Gateway for APRS
An APRS iGate receives APRS packets on the frequency 144.800 MHz and forwards them to the APRS-IS network, where they become visible on maps like aprs.fi. The Raspberry Pi is perfect as a power-efficient iGate running around the clock.
The combination of Direwolf and a simple 2-meter receiver (or an old handheld radio) forms a fully-fledged receive-only iGate. For a bidirectional iGate that also sends messages from the internet to the frequency, you additionally need a transmitter with VOX or PTT control.
The setup involves the following steps: configure Direwolf as TNC, generate an APRS-IS passcode (via the APRS-IS Passcode Generator), enter the server address (e.g. euro.aprs2.net:14580) and filter, and set up the service as a systemd service so the iGate starts automatically after a reboot.
# Example direwolf.conf for iGate
ADEVICE plughw:1,0
CHANNEL 0
MYCALL XX0XXX-10
MODEM 1200
IGSERVER euro.aprs2.net
IGLOGIN XX0XXX-10 12345
PBEACON delay=1 every=30 overlay=R symbol="igate" lat=47.0000 long=15.0000 comment="RX-only iGate"
Winlink RMS Gateway with Pat
Winlink is a worldwide radio email system that is indispensable especially in emergency and disaster situations. With the Raspberry Pi, you can operate both a Winlink client and an RMS Gateway (Radio Message Server).
Pat is a modern Winlink client written in Go for Linux. It offers a web interface that can be conveniently operated from a smartphone or another computer on the network. Installation is done as a pre-built Debian package from the GitHub releases page.
Pat supports various transmission paths: VARA HF (via Wine), VARA FM, Packet Radio (via Direwolf/ARDOP), Pactor (with external hardware) and Telnet (for tests via internet). For amateur radio operation, the combination with Direwolf as TNC is particularly interesting, as no additional hardware is required.
A Winlink RMS Gateway receives Winlink messages via radio and forwards them via the internet to the Winlink CMS server. Operating an RMS Gateway requires appropriate authorization and must be registered with the Winlink team.
Video Tip
Installing and configuring the PAT Winlink client on Raspberry Pi:
KM4ACK: PAT Winlink Client Installation
OpenWebRX+: The Raspberry Pi as WebSDR
OpenWebRX+ is a web-based SDR receiver that allows controlling radio reception via a web browser from anywhere. It is the further development of the original OpenWebRX by HA7ILM and offers numerous improvements.
With an RTL-SDR stick (from about 25 euros) and the Raspberry Pi, you have a fully-fledged WebSDR for the range from about 24 MHz to 1.7 GHz. For shortwave, you need an upconverter or an SDR with direct sampling like the RTL-SDR Blog V4 or an SDRplay RSPdx.
OpenWebRX+ supports a wide variety of demodulation modes: AM, FM, SSB, CW as well as digital decoding of FT8, FT4, WSPR, APRS, DMR, D-STAR, YSF and POCSAG. Installation is done via a ready-made repository:
sudo bash -c "$(wget -qO- https://repo.openwebrx.de/install.sh)"
sudo apt install -y openwebrx
After installation, the WebSDR is accessible on port 8073. Via the web interface, you can create profiles for different bands, adjust waterfall settings and configure digital decodings. Particularly exciting: Multiple users can listen on different frequencies simultaneously.
Video Tip
Building a standalone SDR receiver with Raspberry Pi 5, touchscreen and SDRplay:
TechMinds: DIY Standalone SDR with Raspberry Pi 5
SSTV Decoding
Slow Scan Television (SSTV) enables the transmission of images via radio. On the Raspberry Pi, you can decode and display received SSTV signals with programs like QSSTV. The ISS regularly transmits SSTV images on 145.800 MHz, which makes for an exciting project for beginners.
sudo apt install -y qsstvQSSTV supports all common SSTV modes such as Martin, Scottie and Robot. For automatic reception, you can set up a script that saves incoming images and optionally uploads them to a website — ideal for automatically capturing ISS SSTV events.
JS8Call: Keyboard-to-Keyboard via Shortwave
JS8Call is based on the FT8 protocol but extends it with the ability to exchange free text messages. It is a kind of instant messaging via shortwave and works even with very weak signals. JS8Call also enables store-and-forward messages and querying station information.
Installation on the Raspberry Pi is done by compiling from source code, as no pre-built ARM packages are available. The build dependencies (Qt5, libhamlib, libfftw3) must be installed first. On the Pi 5, the compilation process takes about 15 minutes.
JS8Call is excellently suited for emergency communications, as it can still transmit messages even under the worst conditions. In combination with a solar-powered Raspberry Pi and a QRP transceiver, you have an extremely effective emergency communications station.
Log4OM and Other Logging Software
For logging QSOs on the Raspberry Pi, there are several options. Log4OM is primarily a Windows application but can be run on the Pi via Wine. More native and resource-efficient alternatives are CQRLOG (Qt-based, runs natively on Linux) or the web-based Wavelog, which runs on a local web server.
Wavelog is particularly recommended: It runs as a PHP application on an Apache or Nginx web server and offers a modern web interface. You can access it from any device on the network, and it supports ADIF import/export, real-time QSO entry, statistics, awards tracking and integration with LoTW, eQSL and QRZ.com.
Sound Card Interfaces: The Connection to the Transceiver
For all digital modes, you need an audio interface between the Raspberry Pi and the transceiver. There are various options:
- Digirig Mobile: A compact USB interface specifically designed for amateur radio. It contains a USB sound card and a serial interface for CAT control and PTT in a small enclosure. Ideal for portable operation.
- SignaLink USB: A proven interface with built-in USB sound card chip. Volume is adjusted via internal potentiometers. Various cable sets allow connection to virtually any transceiver.
- Homebrew interface: With a cheap USB sound card (CM108 chip), two resistors, a capacitor and a VOX or PTT circuit, you can build a working interface for just a few euros. Numerous construction guides can be found on the internet.
- Integrated USB sound card: Many modern transceivers like the Icom IC-7300, Yaesu FT-991A or Kenwood TS-890S already have a built-in USB sound card. Here, a simple USB cable is sufficient for connecting to the Pi.
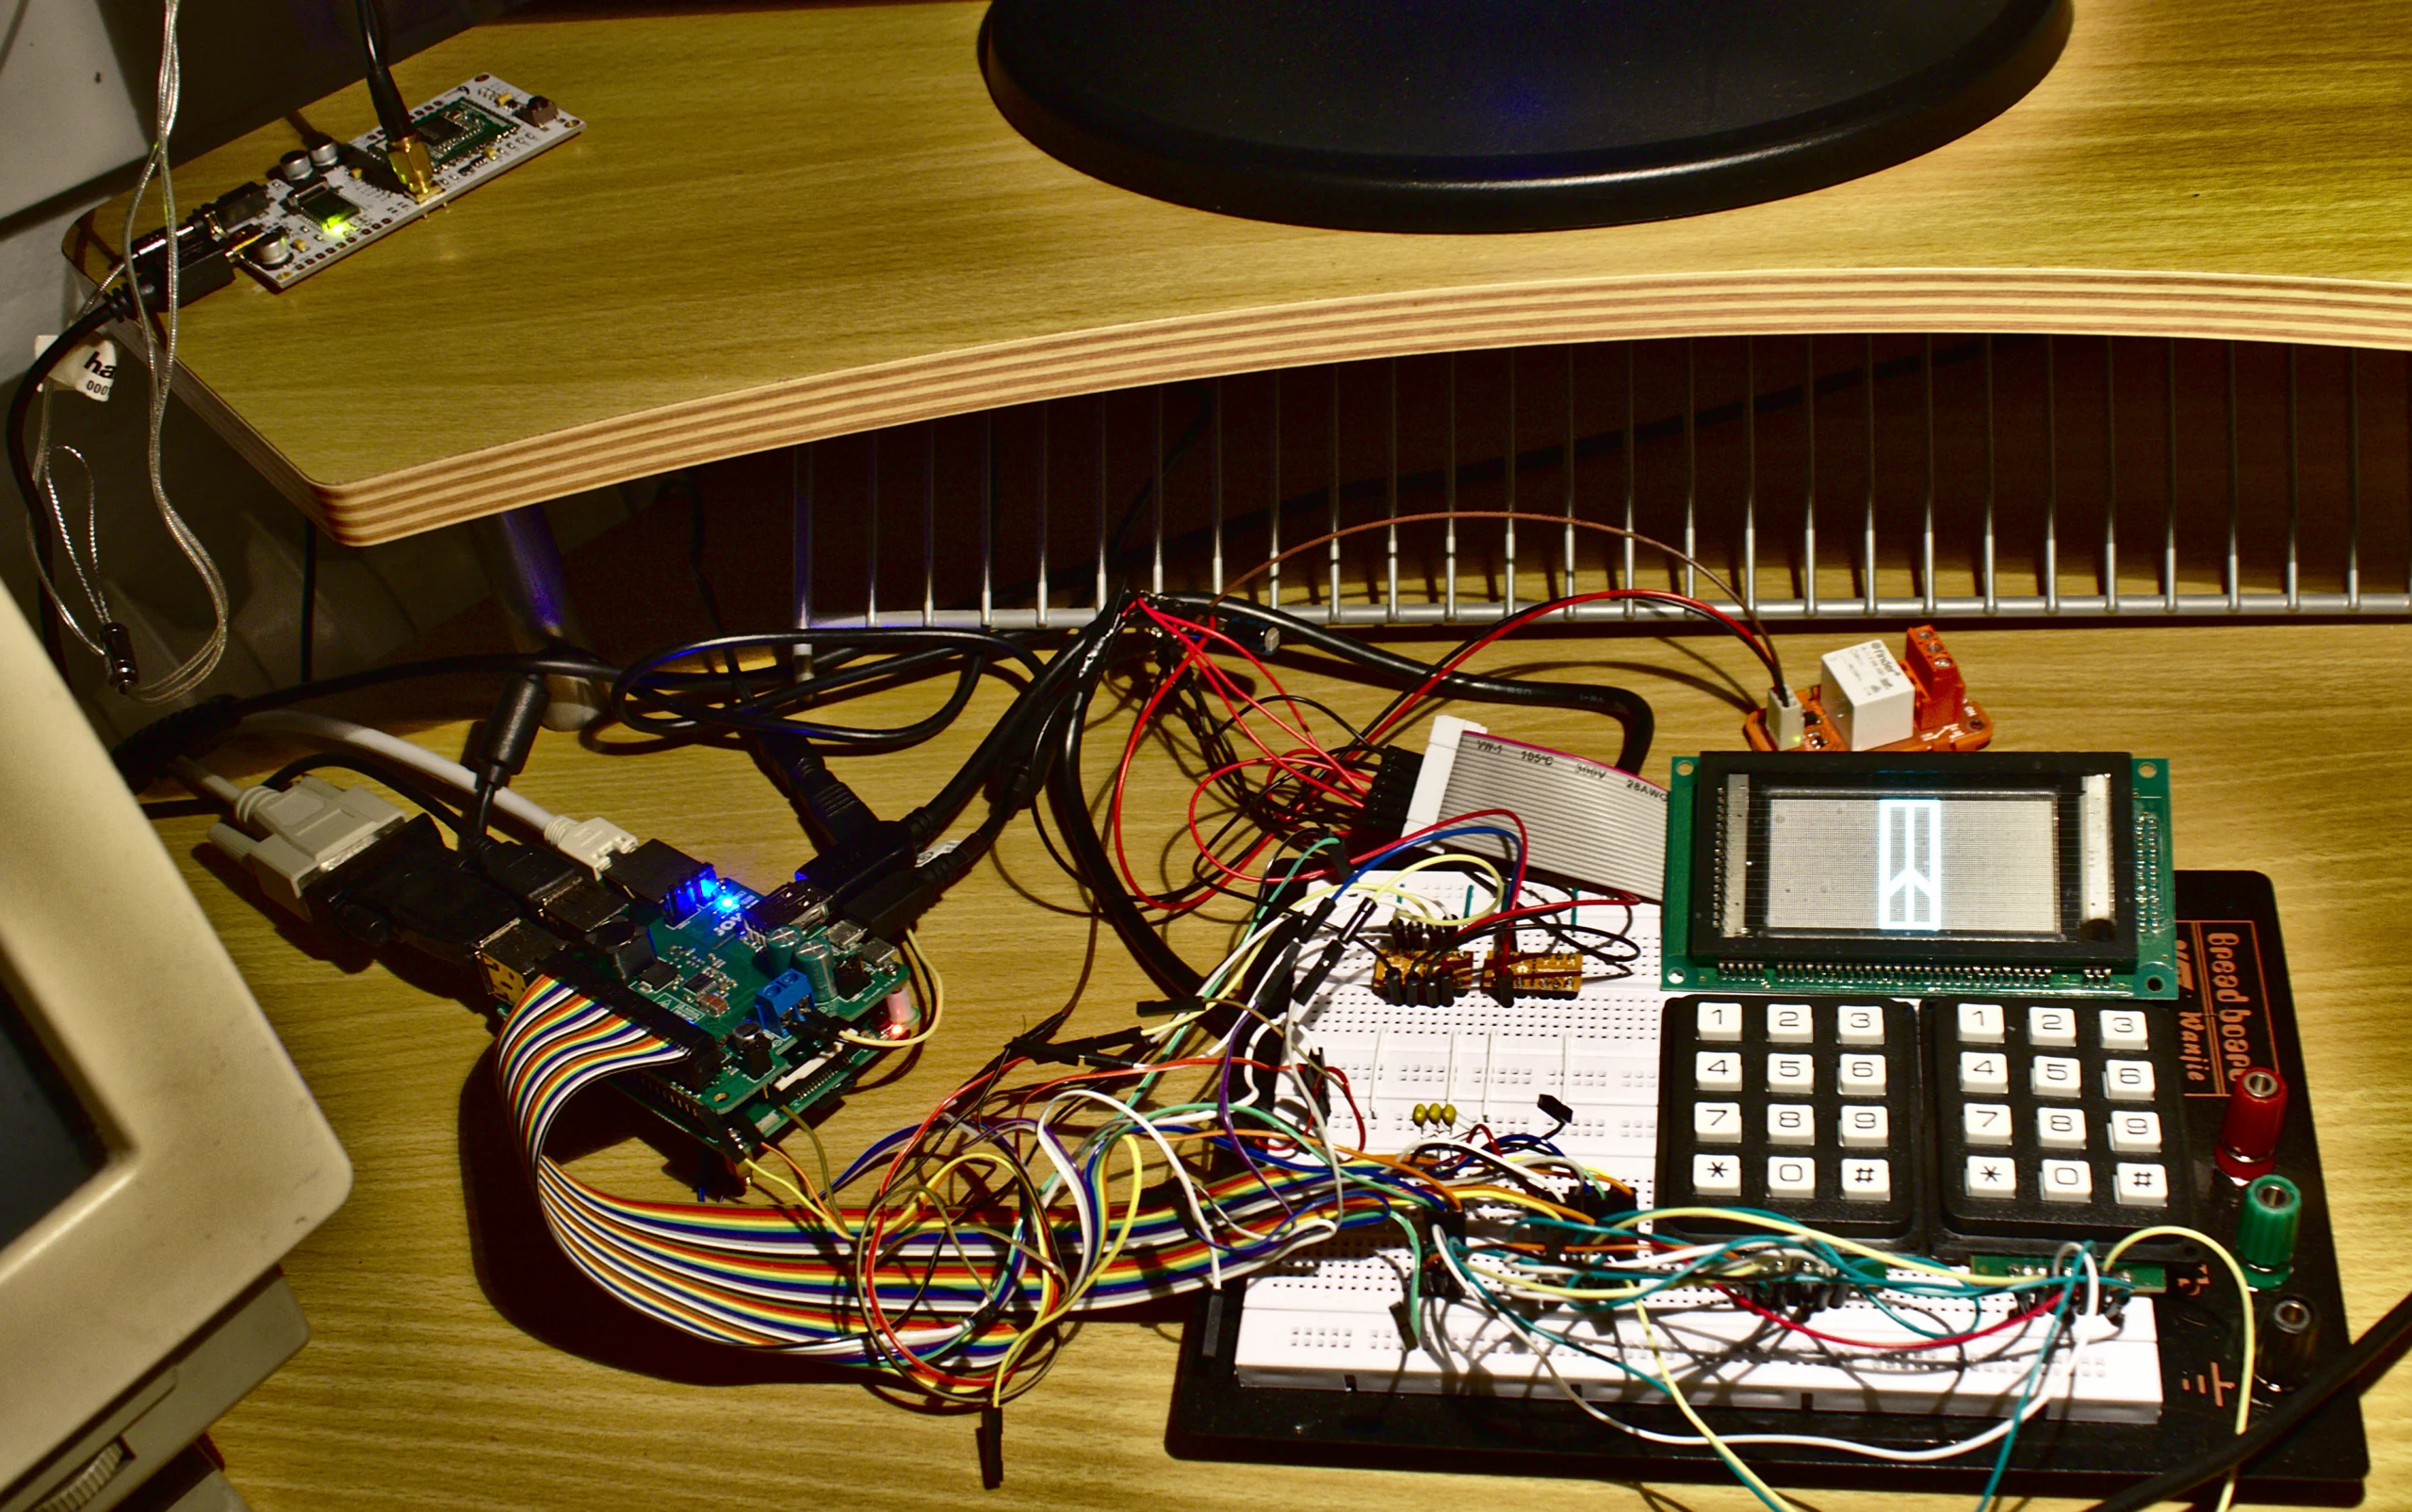
GPIO for CW Keying and PTT Control
The GPIO pins of the Raspberry Pi can be used directly for CW keying and PTT control. Via a simple transistor (e.g. 2N2222) or an optocoupler (e.g. PC817), the GPIO pin is connected to the KEY or PTT input of the transceiver.
Programs like cw-daemon or cwdaemon use the GPIO pins directly for CW character generation. Fldigi can also be configured to control PTT via a GPIO pin. The advantages over serial PTT control: No additional hardware needed, very low latency and reliable timing.
Important: The GPIO pins operate at 3.3V logic level. A direct connection to the transceiver without level conversion or galvanic isolation can lead to damage. An optocoupler provides the safest solution here.
Remote Access: VNC and SSH
One of the biggest advantages of the Raspberry Pi in the shack is the ability for remote control. Via SSH you have full command line access, via VNC you can remotely control the desktop.
For SSH, everything is already prepared on Raspberry Pi OS — you just need to enable SSH during initial setup or via raspi-config. For VNC, RealVNC or alternatively TigerVNC is recommended. This way, you can conveniently operate WSJT-X, Fldigi or other graphical programs from a laptop, tablet or even smartphone.
For remote access from outside (outside the home network), you should set up a VPN, e.g. WireGuard, which is excellently suited for the Raspberry Pi thanks to its low resource requirements. This gives you secure access to your amateur radio station from anywhere.
Particularly elegant: With an SSH tunnel, you can forward individual ports, e.g. the web server of OpenWebRX+ or the Pat web interface, without having to set up a complete VPN.
Power Consumption and Cooling
Low power consumption is one of the main advantages of the Raspberry Pi compared to a PC. Typical values under load:
- Pi 5 (8 GB): approx. 5-8 watts under load, idle approx. 3 watts
- Pi 4 (4 GB): approx. 4-6 watts under load, idle approx. 2.5 watts
- Pi Zero 2 W: approx. 1-2 watts under load, idle under 1 watt
For comparison: A typical desktop PC consumes 80-200 watts. The Raspberry Pi can therefore run around the clock without noticeably affecting the electricity bill. For 24/7 operation as an iGate or RMS gateway, electricity costs amount to less than 2 euros per month.
Adequate cooling is important, especially for the Pi 5. A passive heatsink is sufficient for light applications, but for continuous load an active fan or the official Active Cooler case is recommended. Without cooling, the Pi throttles the clock frequency under high load (thermal throttling), which can impair decoding performance in WSJT-X.
SD Card: Tips for Reliability
The SD card is the Achilles heel of the Raspberry Pi. During continuous operation, cheap SD cards can fail after a few months. The following measures increase reliability:
- Use high-quality SD cards: Samsung EVO Plus, SanDisk Extreme or Kingston Canvas Go Plus have proven reliable. Class A2 offers the best performance for the Pi.
- Redirect log files to RAM: With log2ram or zram, write accesses to the SD card are minimized.
- Regular backups: A simple script that regularly creates an image of the SD card saves hours of reinstallation in case of failure.
- Boot from USB SSD: The Pi 4 and Pi 5 can boot directly from a USB SSD. An SSD is faster, more reliable and more durable than any SD card.
Especially for 24/7 operation of an iGate or gateway, we strongly recommend switching to a USB SSD. Small M.2 SSDs with USB adapters are already available for under 20 euros and offer significantly higher longevity.
Further Resources
YouTube Channels
- KM4ACK — The go-to channel for Raspberry Pi in amateur radio. Developer of Build-a-Pi / 73 Linux.
- OH8STN — Off-grid ham radio with Raspberry Pi. Portable setups, JS8Call, Winlink/PAT and solar power.
- TechMinds — SDR projects, RadioBerry HF transceiver, ADS-B and more.
Software and Projects
- Build-a-Pi / 73 Linux (KM4ACK) — Automated install script for ham radio software
- HamPi (W3DJS) — Pre-configured Raspberry Pi image with ham radio software
- Pat Winlink — Modern Winlink client for Linux with web interface
- Direwolf — Software TNC for APRS and Packet Radio
Guides
- DL1GKK: Setup Raspberry Pi for Ham-Radio — Comprehensive guide with video links
- RTL-SDR.com: Setting up RPi for Ham Radio — RTL-SDR setup guide
Conclusion: The Raspberry Pi as Universal Shack Tool
The Raspberry Pi has established itself as an indispensable tool in the modern amateur radio shack. Whether as an FT8 machine, APRS iGate, Winlink gateway, WebSDR server or CW keyer — the possibilities are virtually unlimited. Low power consumption, compact size and low cost make it ideal for dedicated applications that need to run around the clock.
For beginners, we recommend starting with a single application — such as an APRS iGate with Direwolf or FT8 with WSJT-X — and then gradually expanding the Raspberry Pi with additional functions. The active community and excellent documentation make getting started easy.
73 – your oeradio.at editorial team
Transparency Notice
This article was researched and written with the assistance of AI (Claude, Anthropic). All content has been reviewed by the oeradio.at editorial team.